How to Resize an Image in Canva for Your Website
Share on Social
Array
(
    [networks] => Array
        (
            [0] => facebook
            [1] => twitter
            [2] => pinterest
            [3] => linkedin
        )

    [has] => Array
        (
            [facebook] => 1
            [twitter] => 1
            [instagram] =>
            [pinterest] => 1
            [houzz] =>
            [linkedin] => 1
        )

)

One of the challenges of managing your own website is resizing your images. It is a best practice to prepare your images before you upload them to any website platform like WordPress or Squarespace. This is because large images effect site speed and load times.
Luckily, resizing images for the web is an easy task with Canva, a free-to-use design tool that allows you to resize images and other graphics online. Read this article for detailed step-by-step instructions on how to resize an image in Canva for your website.
The reason you want to prepare your website images is two-fold. First, you need to reduce the file size of your images so that your website will load fast. Large images can impact the speed of your website drastically. Second, you need to edit the photo’s file name to optimize it for search engines.
Here is an example. I’ve purchased a stock photo, and out-of-the-box the file size is 20 MB. This is much too large for a website. Images should always be under 1 MB if possible; 500 KB is the optimal size to shoot for.

This is a high-resolution image; we want to convert it to a low-resolution image. We can do this by using the free version of Canva. Visit our blog article about photo resolution to learn more on this topic.
Resizing Images with Canva
Step One: Log into Canva
If you don’t already have a Canva account, start by making a free account on the platform.
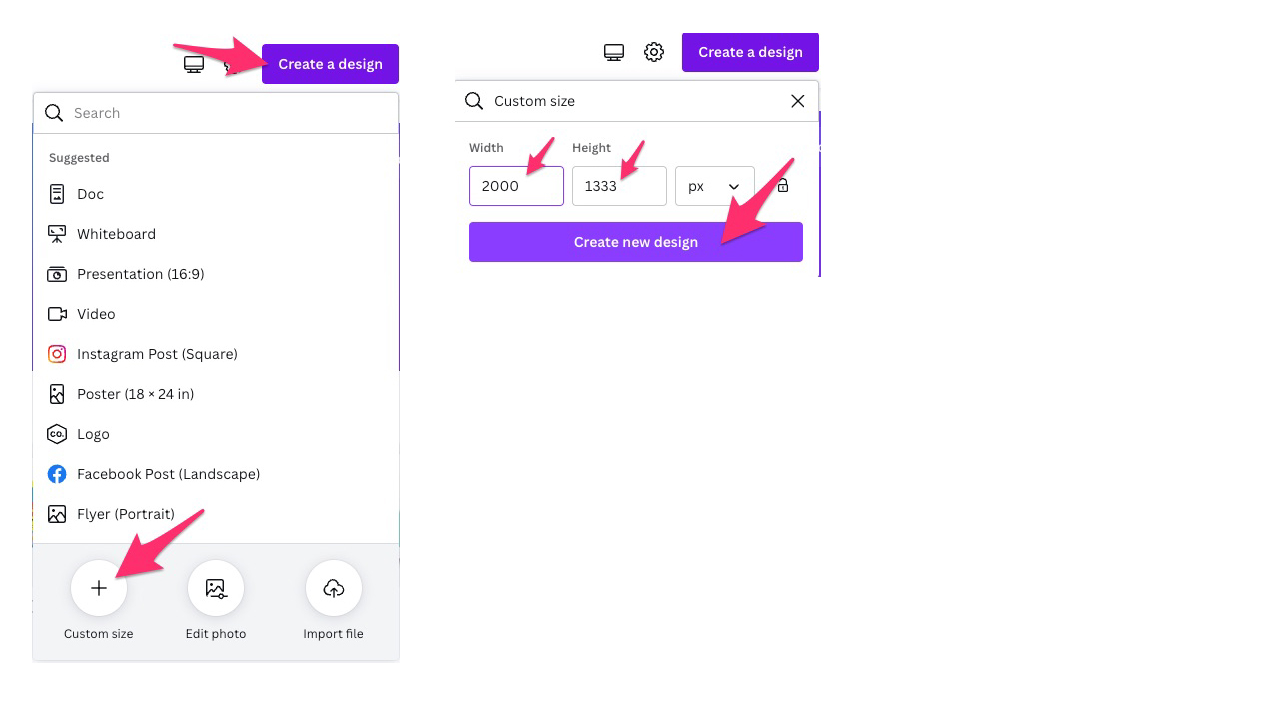
Step Two: Create a Design
In the upper right-hand corner choose click on the CREATE A DESIGN BUTTON >> then choose CUSTOM SIZE >> then ENTER THE SIZE.
For websites created by LaLa Projects, we always recommend 2000 px wide images for full-width banner/hero images.
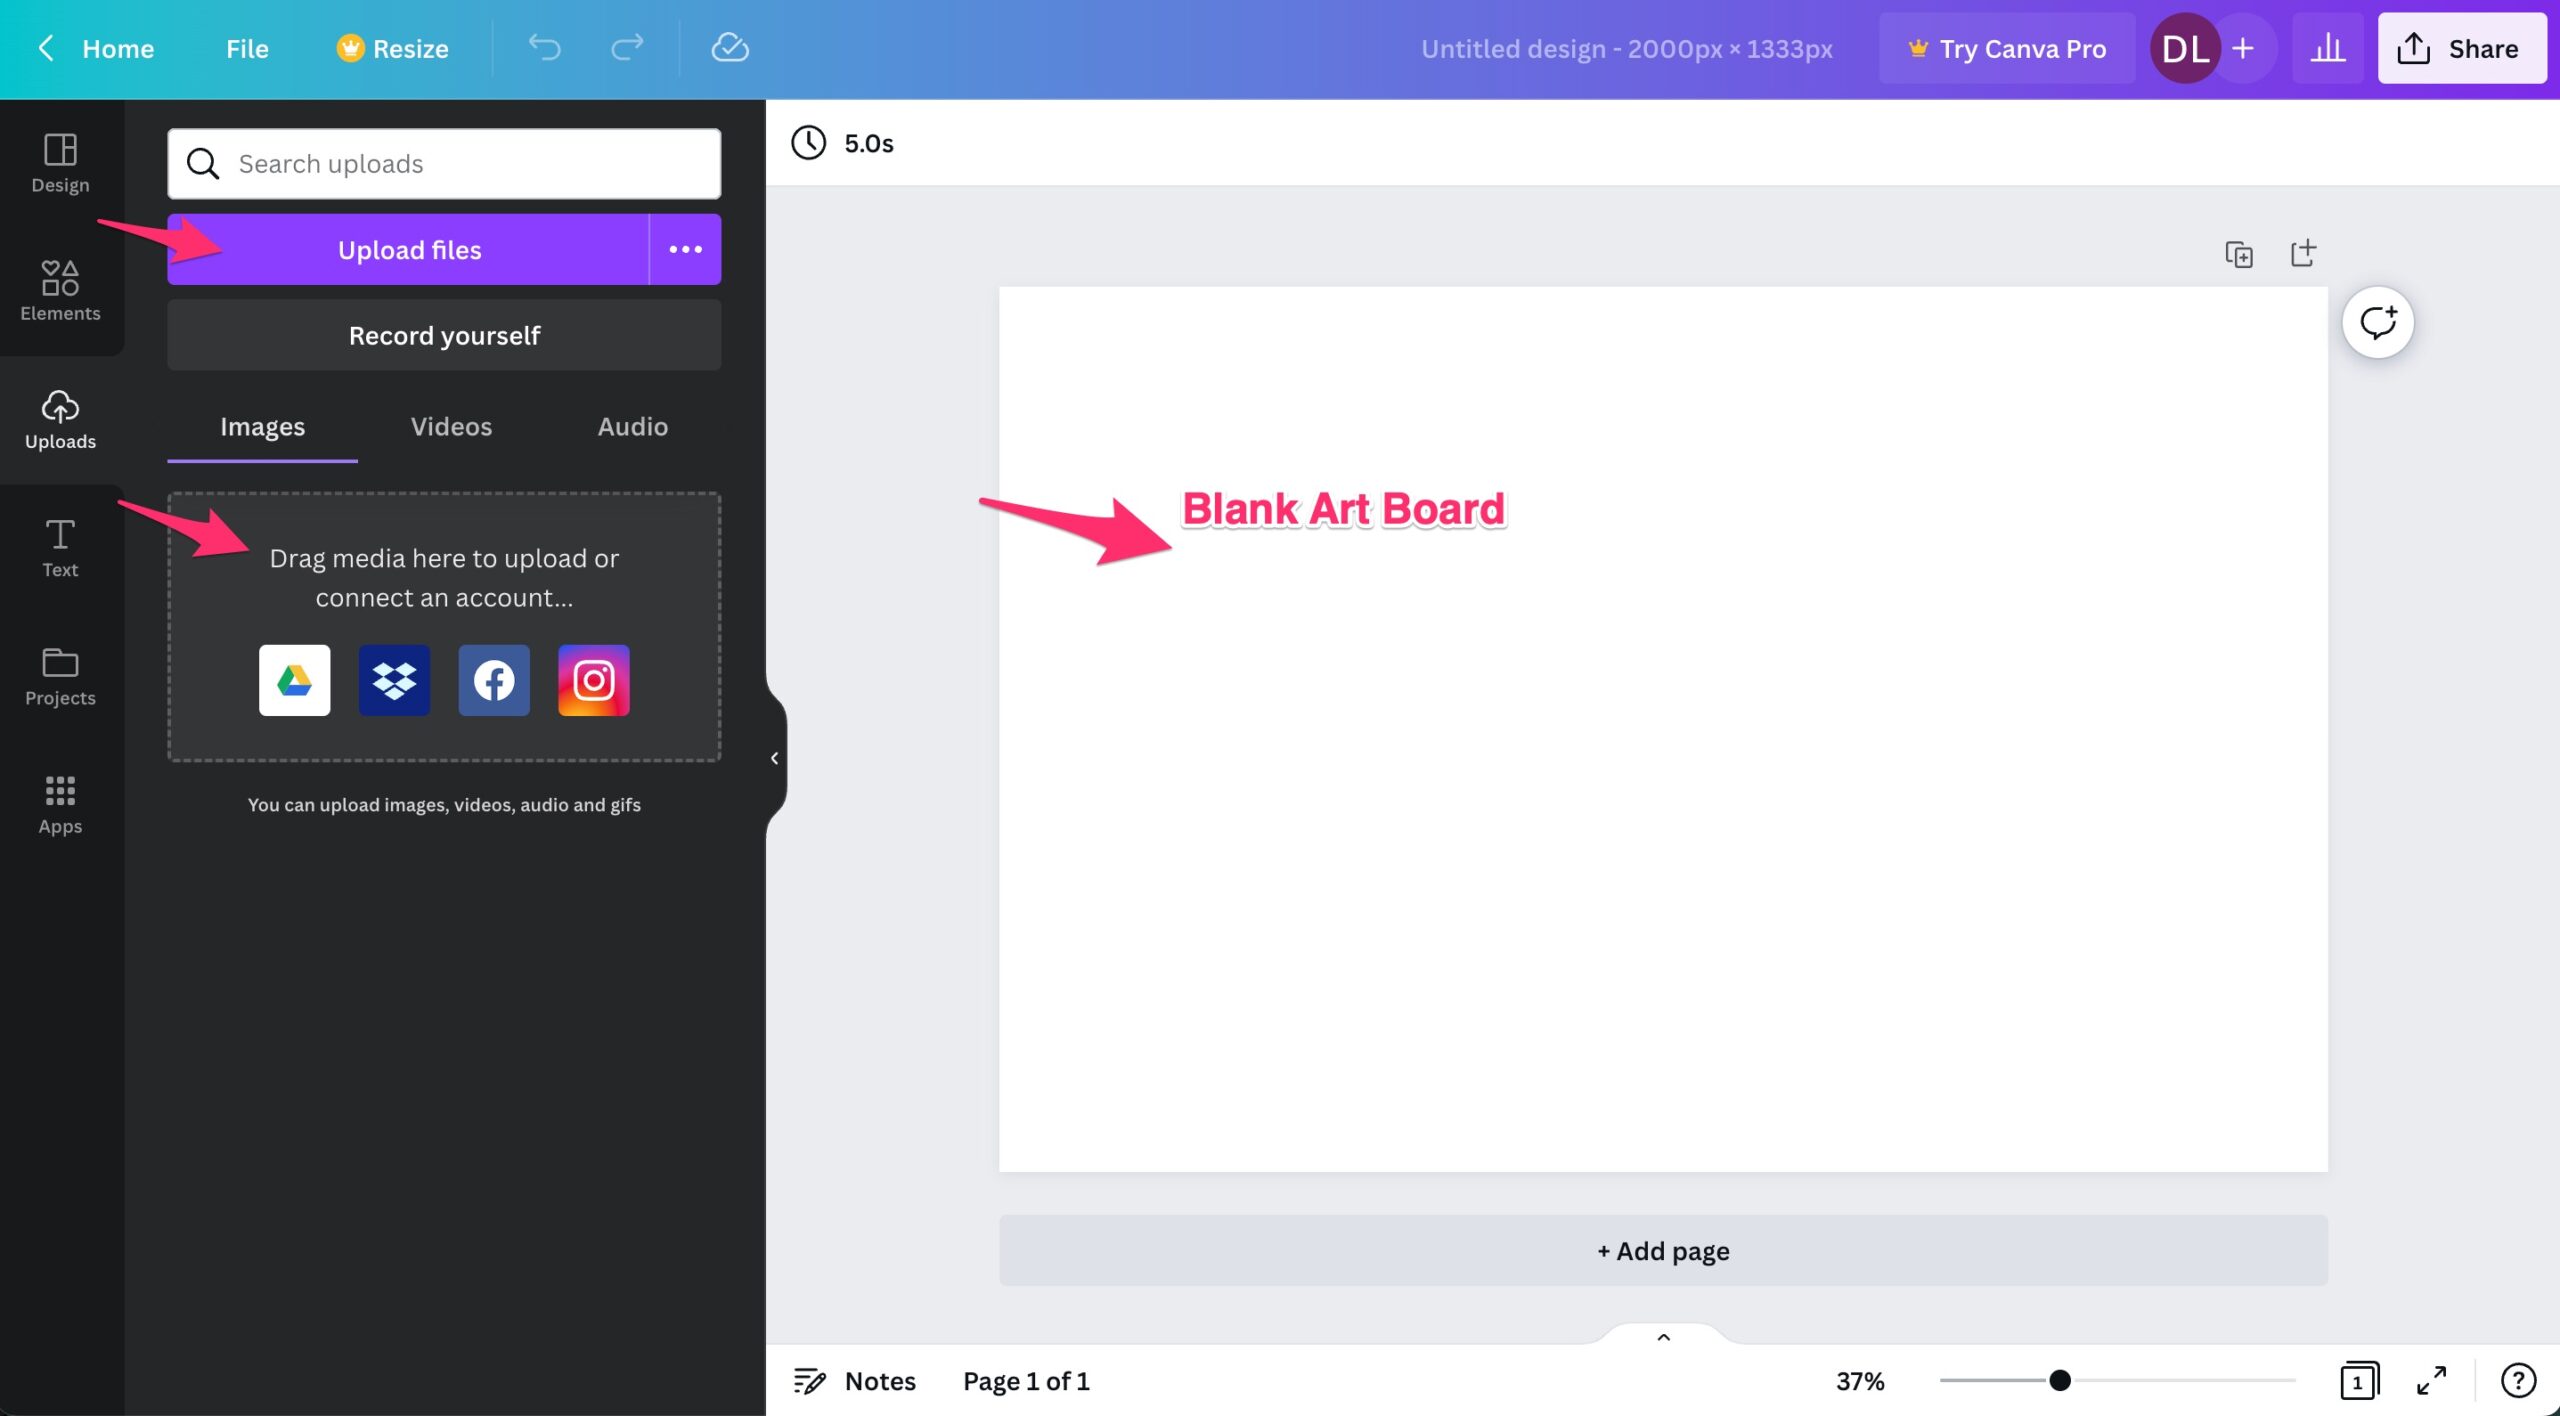
Step Three: Upload an Image
Open the UPLOADS menu on the left >> You can upload an image, drag & drop an image, connect to a third-party account, or pull from your existing Canva media library.
Step 4: Size Up the Photo & Name the Photo
The photo will appear in the middle of the artboard. You can easily size up the photo by using the corner handle tools to stretch it into position, so it fills the entire artboard.
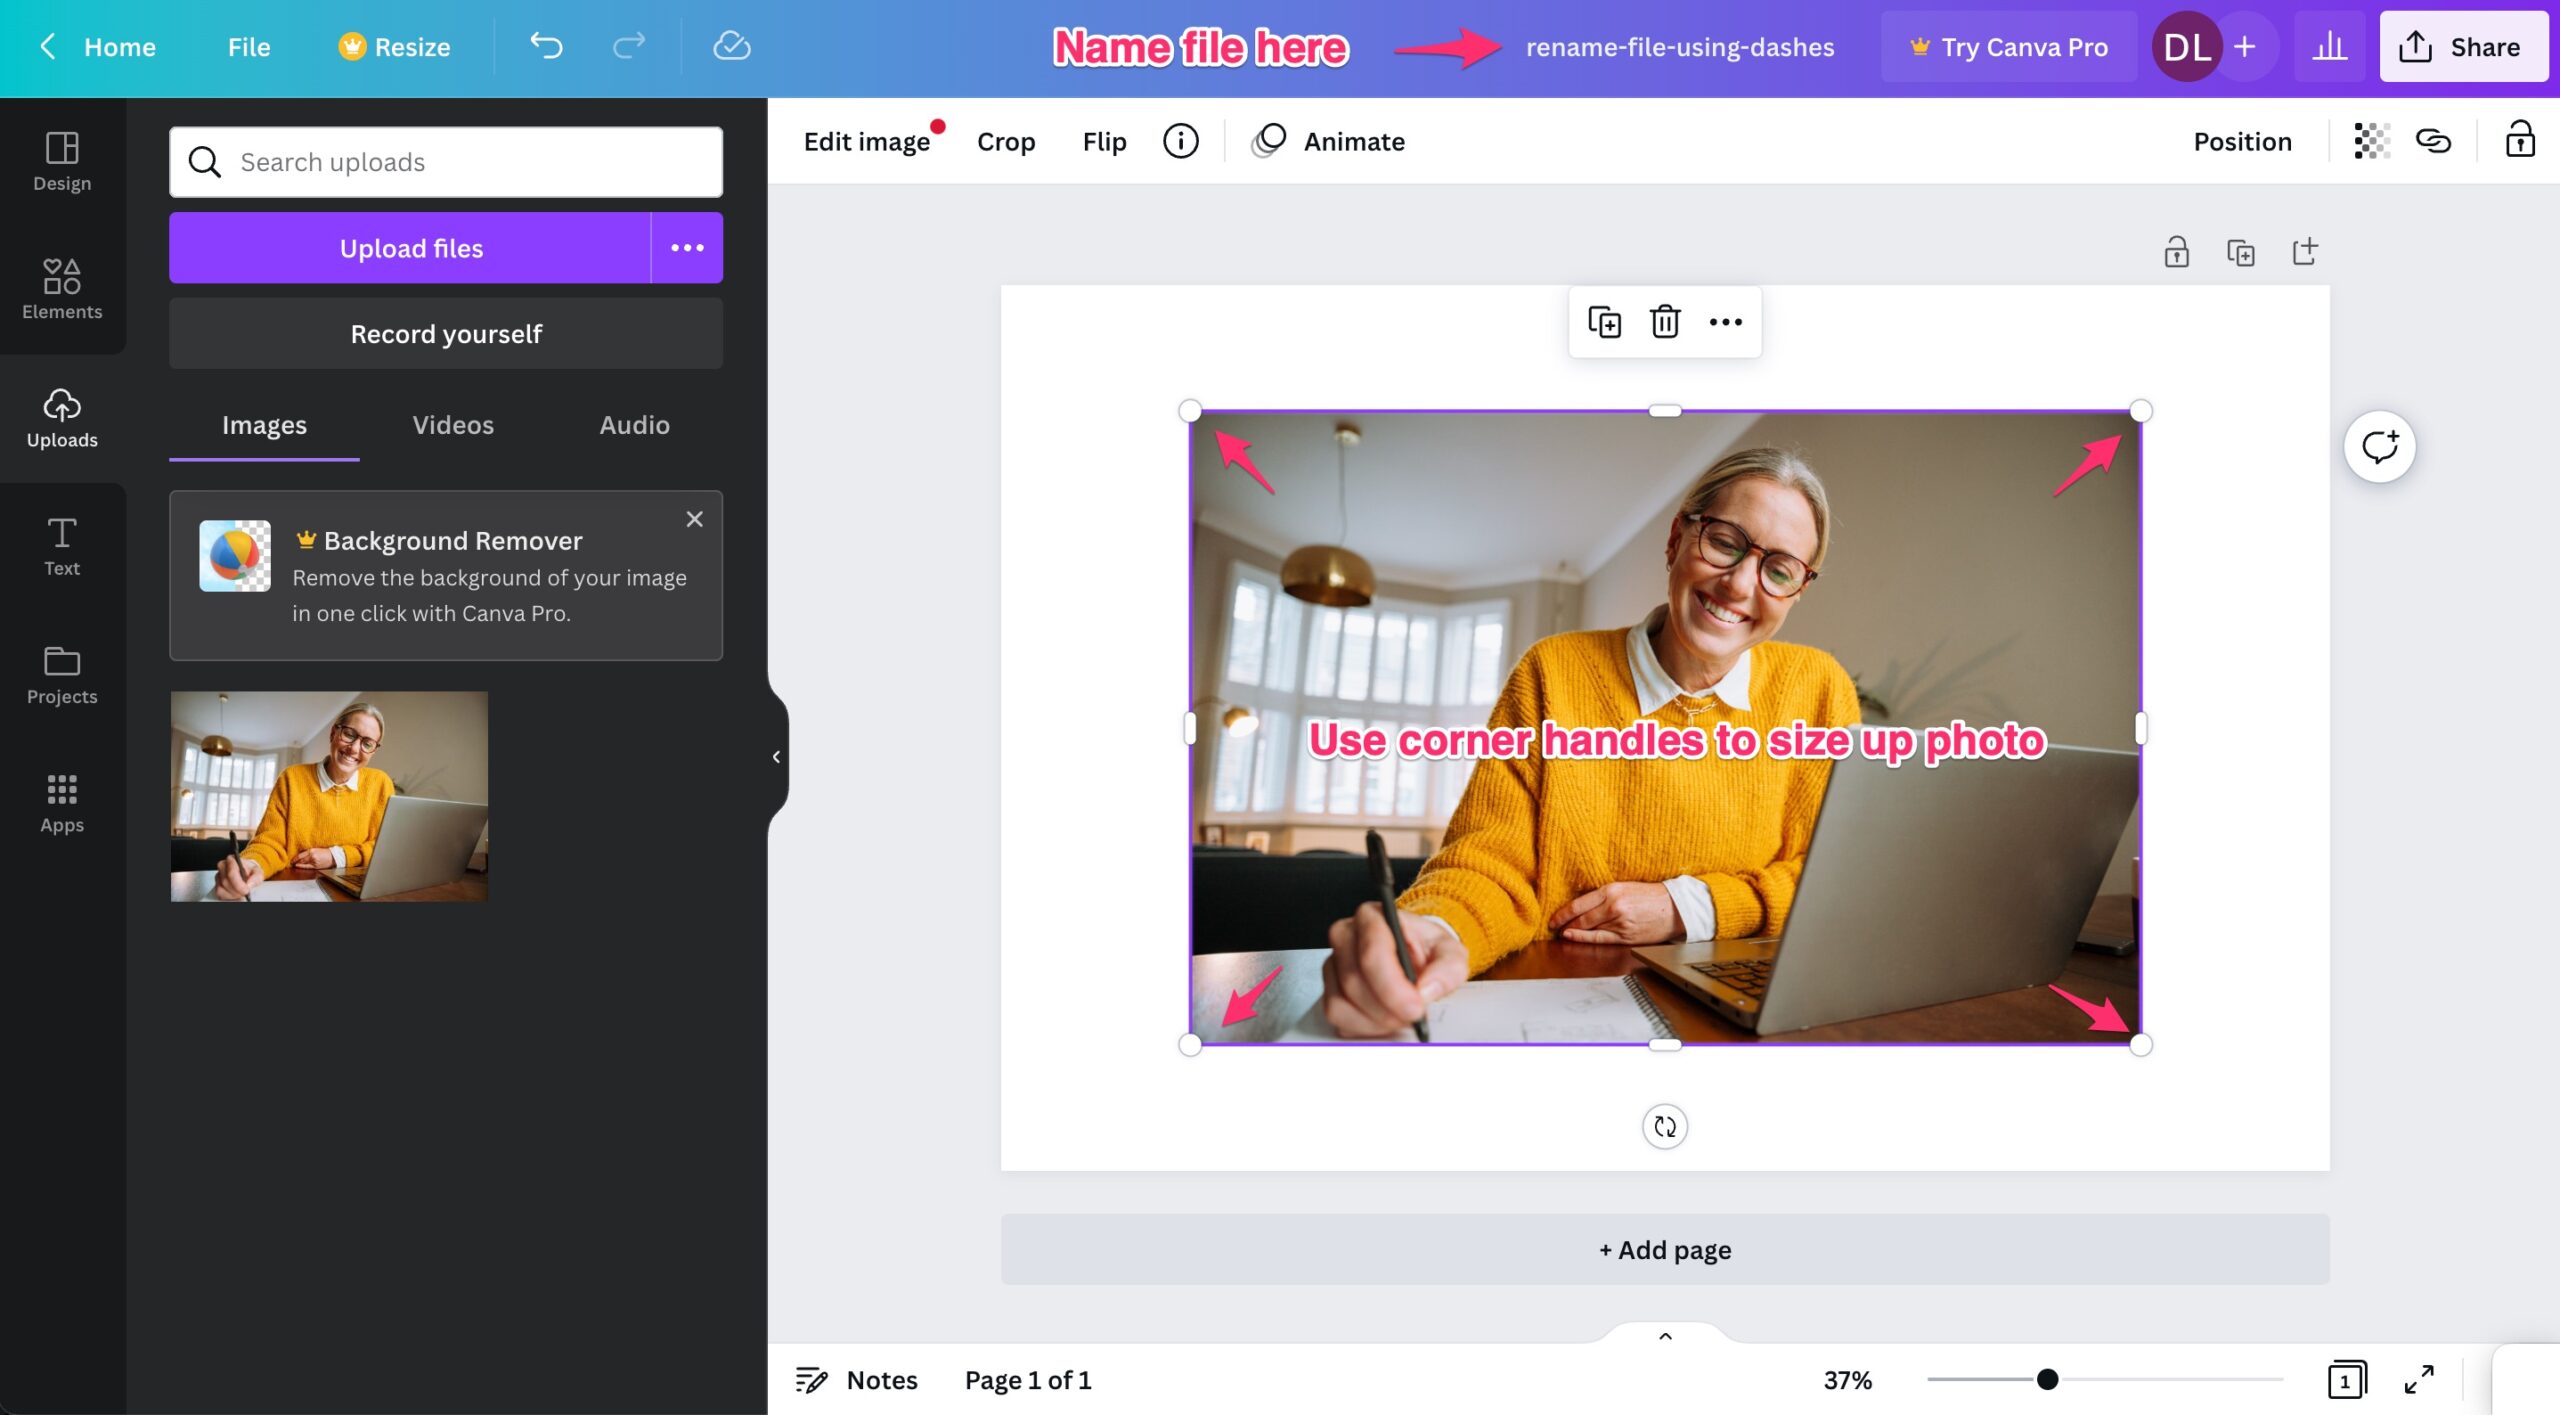
Step 5: Name the Photo
Properly naming files for the web is important for SEO. Search Engines cannot view and understand the content of your photo without a little help from you.
An image file name of IMG123.jpg doesn’t mean anything, but an image file name of words-seperated-by-dashes.jpg is readable by a search engine. Properly formatted file names are lowercase and separated by dashes. Ideally, the file name will also match the topic of the page.
For example, for the featured image on this page, we will use the file name: rename-file-using-dashes.jpg
You can edit the name of the photo you are creating at the top of the Canva screen by double-clicking on it.
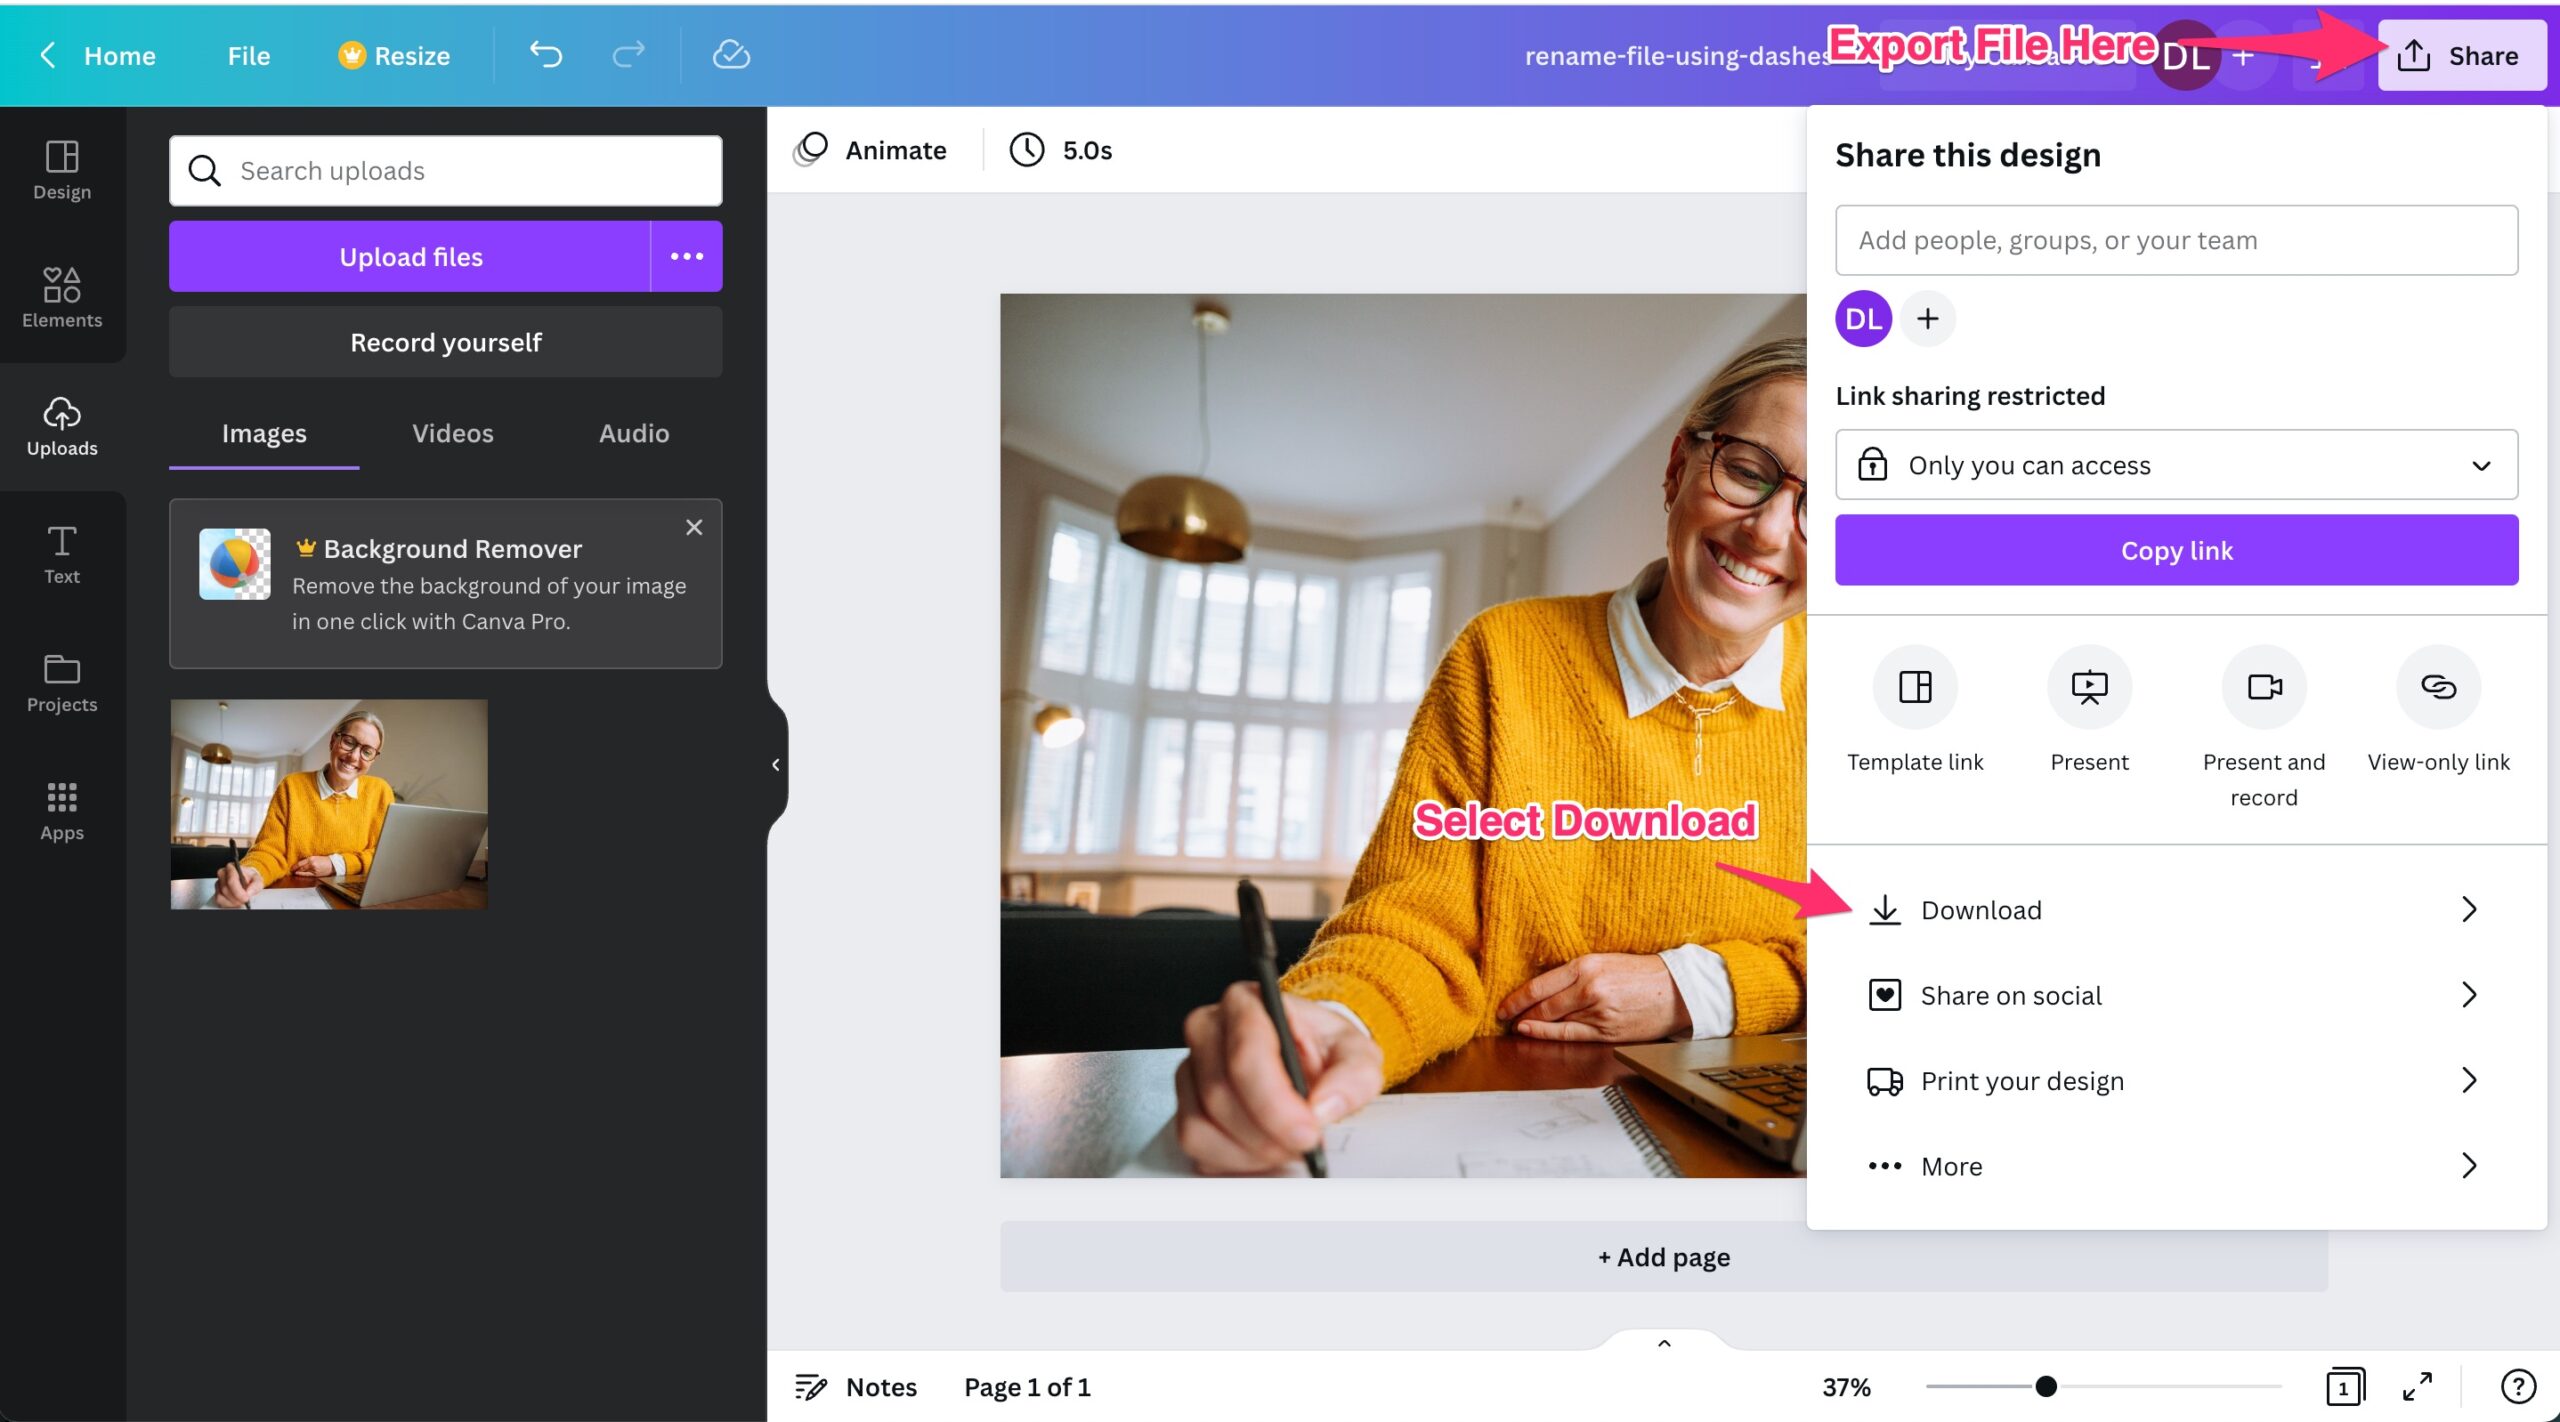
Step 6: Export Photo
The final step is to export the photo to your local machine or other preferred location.
In the upper right-hand corner click on the SHARE button >> with will open a share panel >> select DOWNLOAD.
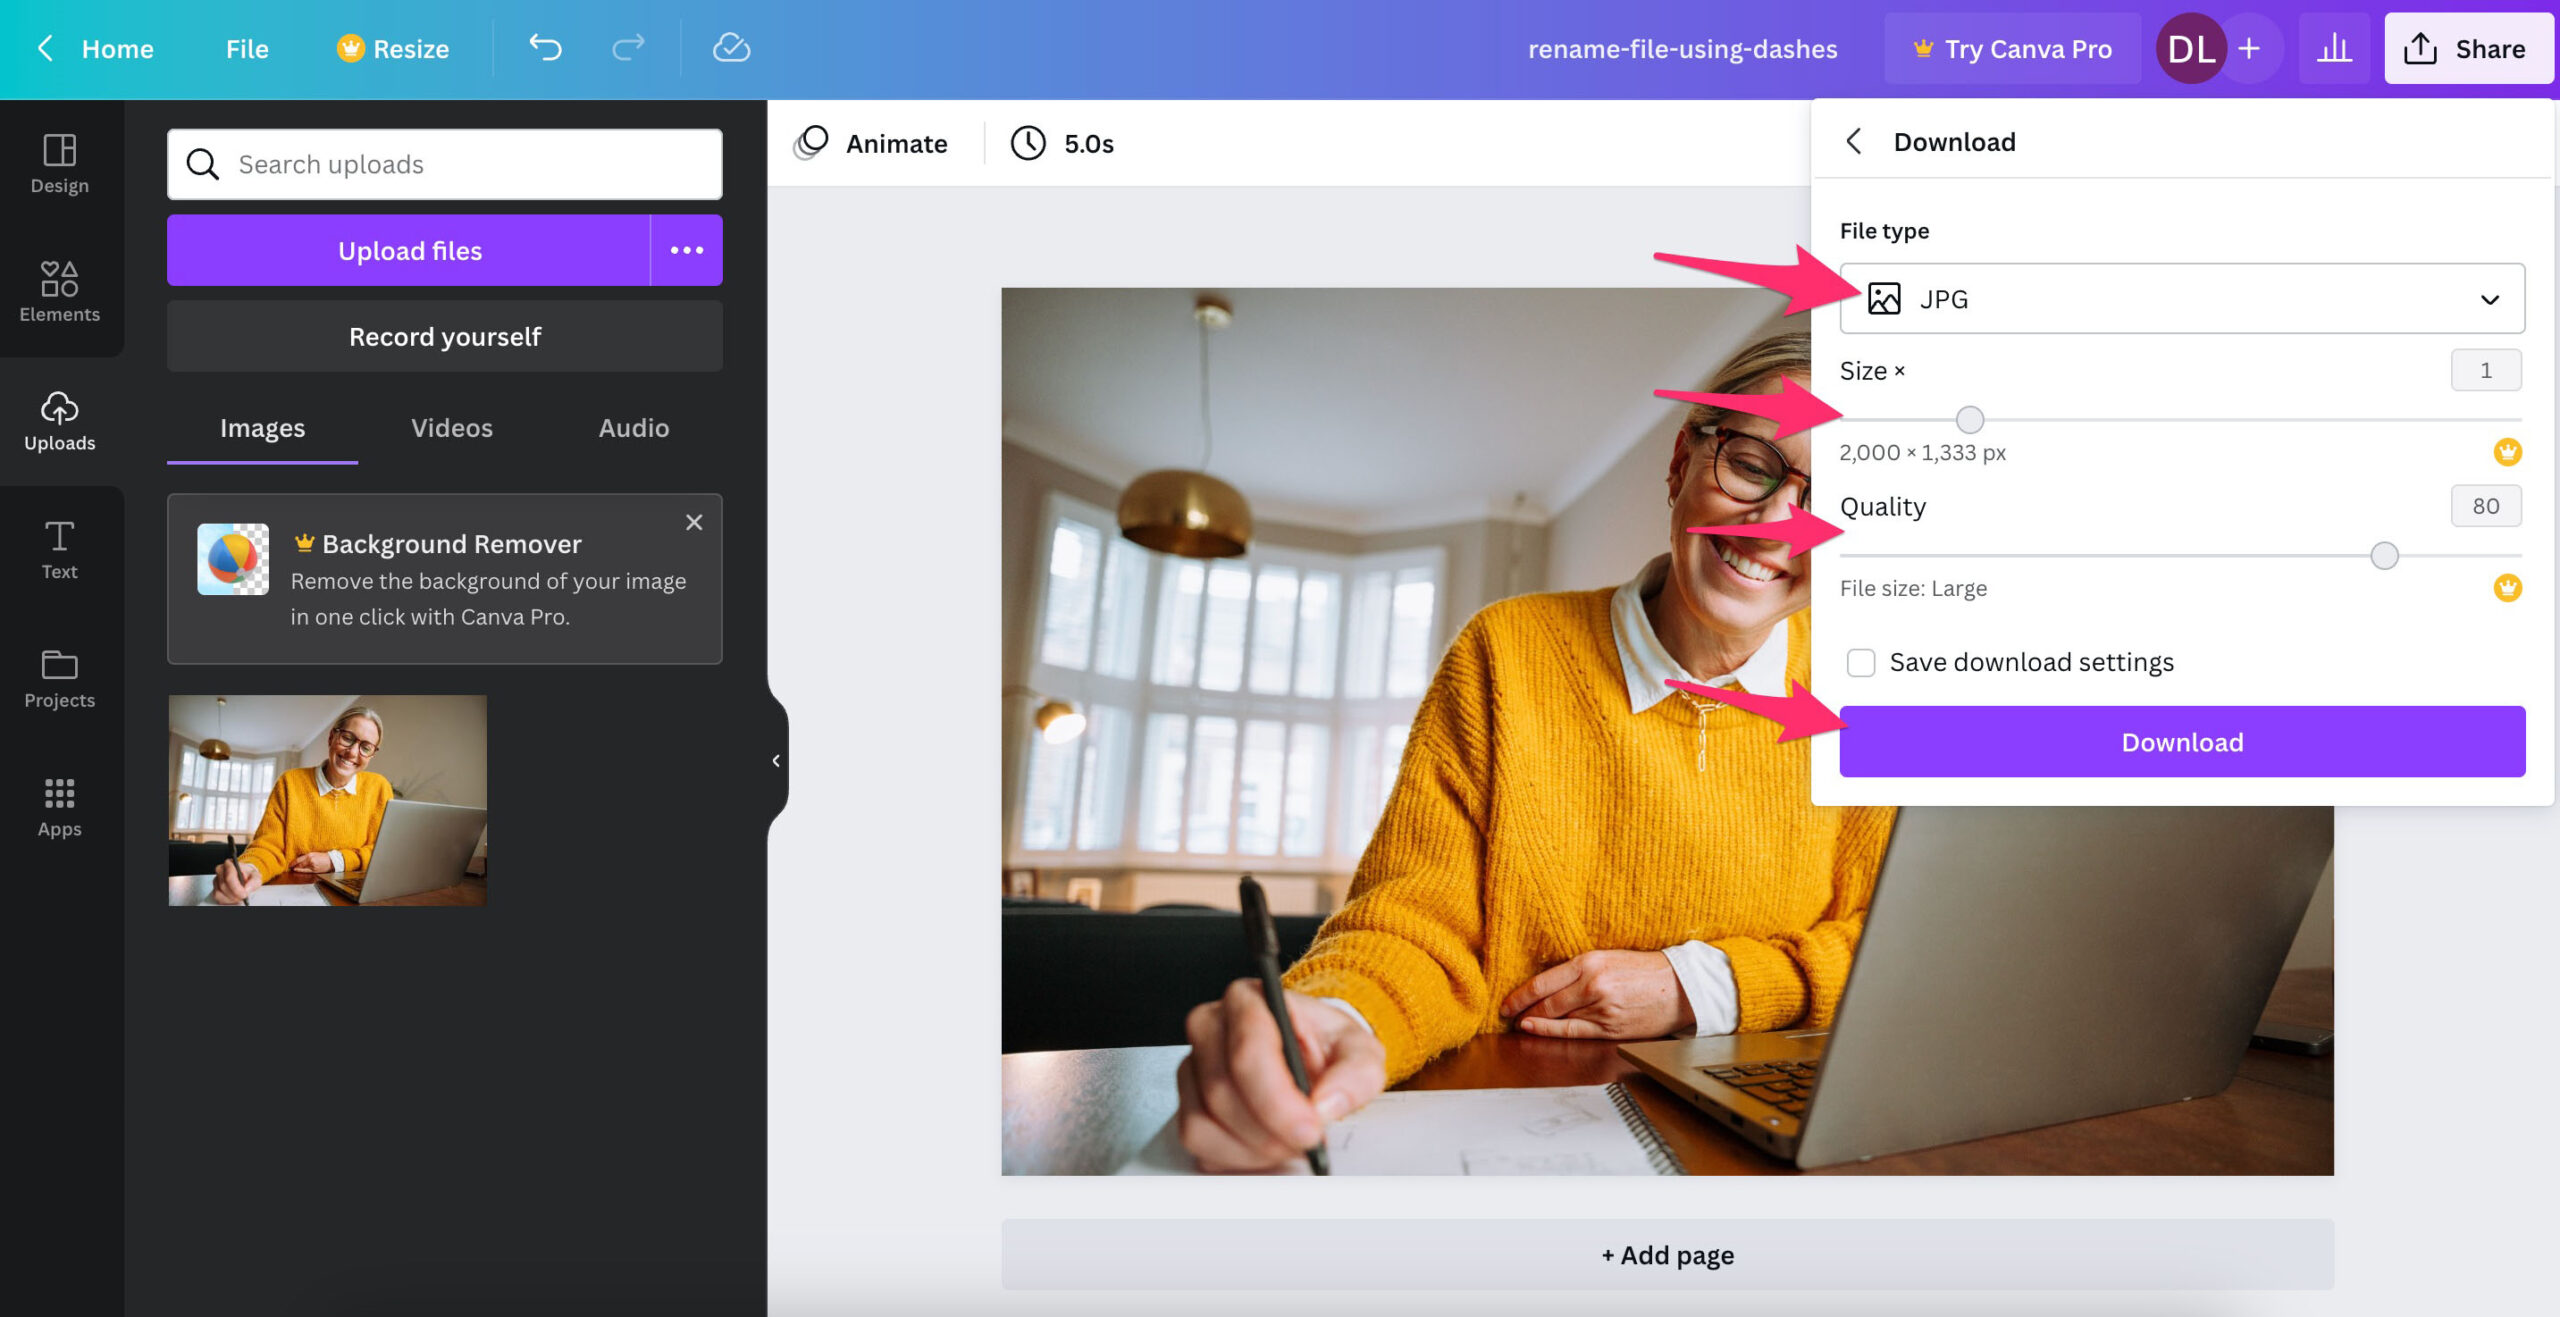
Next >> Select the file type JPG. JPGs are the best file type to use for website photos. >> Choose Size 2000 x 1333px if you are creating a banner or hero image >> Quality level = 80 >> Then click the DOWNLOAD button.
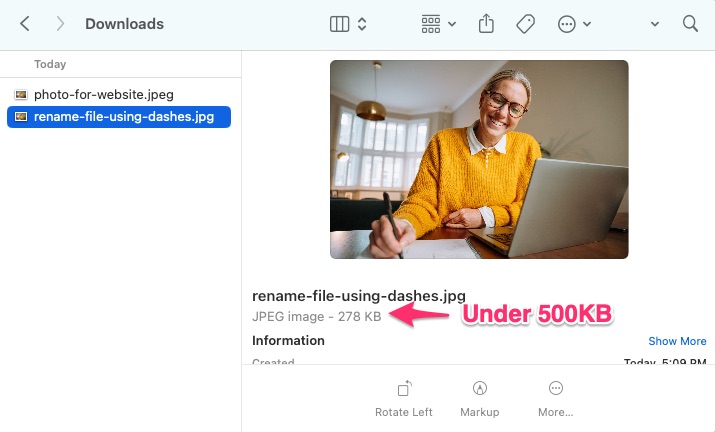
Step 7: Check your File Size
Let’s review the new file size to ensure we have what we need. Upon review, this image is not well under the 500 KB size, so it is now READY to be uploaded into your website’s media library!