

How to Install a Premium WordPress Plugin
Share on Social
Array
(
    [networks] => Array
        (
            [0] => facebook
            [1] => twitter
            [2] => pinterest
            [3] => linkedin
        )

    [has] => Array
        (
            [facebook] => 1
            [twitter] => 1
            [instagram] =>
            [pinterest] => 1
            [houzz] =>
            [linkedin] => 1
        )

)

When you first start working in WordPress (WP) the plugin installation process can feel a bit intimidating. We’re here to walk you through the steps.
Free vs. Premium Plugins
The first thing to understand is that there are free and premium (paid) plugins. Free plugins can be selected from WordPress’ plugin library, but premium plugins need to be uploaded.
Free plugins are often LITE versions of premium plugins, to unlock the full potential of a plugin you will need to purchase the premium license.
Word to the wise
There are MANY free plugins in the WordPress marketplace. Some are good, some are ok, some are bad, and some are downright malicious. Be careful which free plugins you use, read the review, and look for a high number of users.
Don’t go plugin install crazy
Many WP newbies and some not-so-great WP developers go a little overboard with plugin installs. Just like the saying, there is an App for that, well there is a plugin for everything too.
The downside of adding too many plugins is that they can add what is called ‘code bloat’ and can slow your website speeds down. No one waits for a slow website to load.
Another concern when using too many plugins is creating code conflicts. When you have a code conflict functionality can break or entire websites can break. It can be really difficult for a non-developer to figure out why.
Let’s get started with an install
When you purchase a premium plugin you will need to download the files onto your computer. The download will be a .zip file. No need to unpack it, you will want to leave it zipped up.
Dive into WordPress
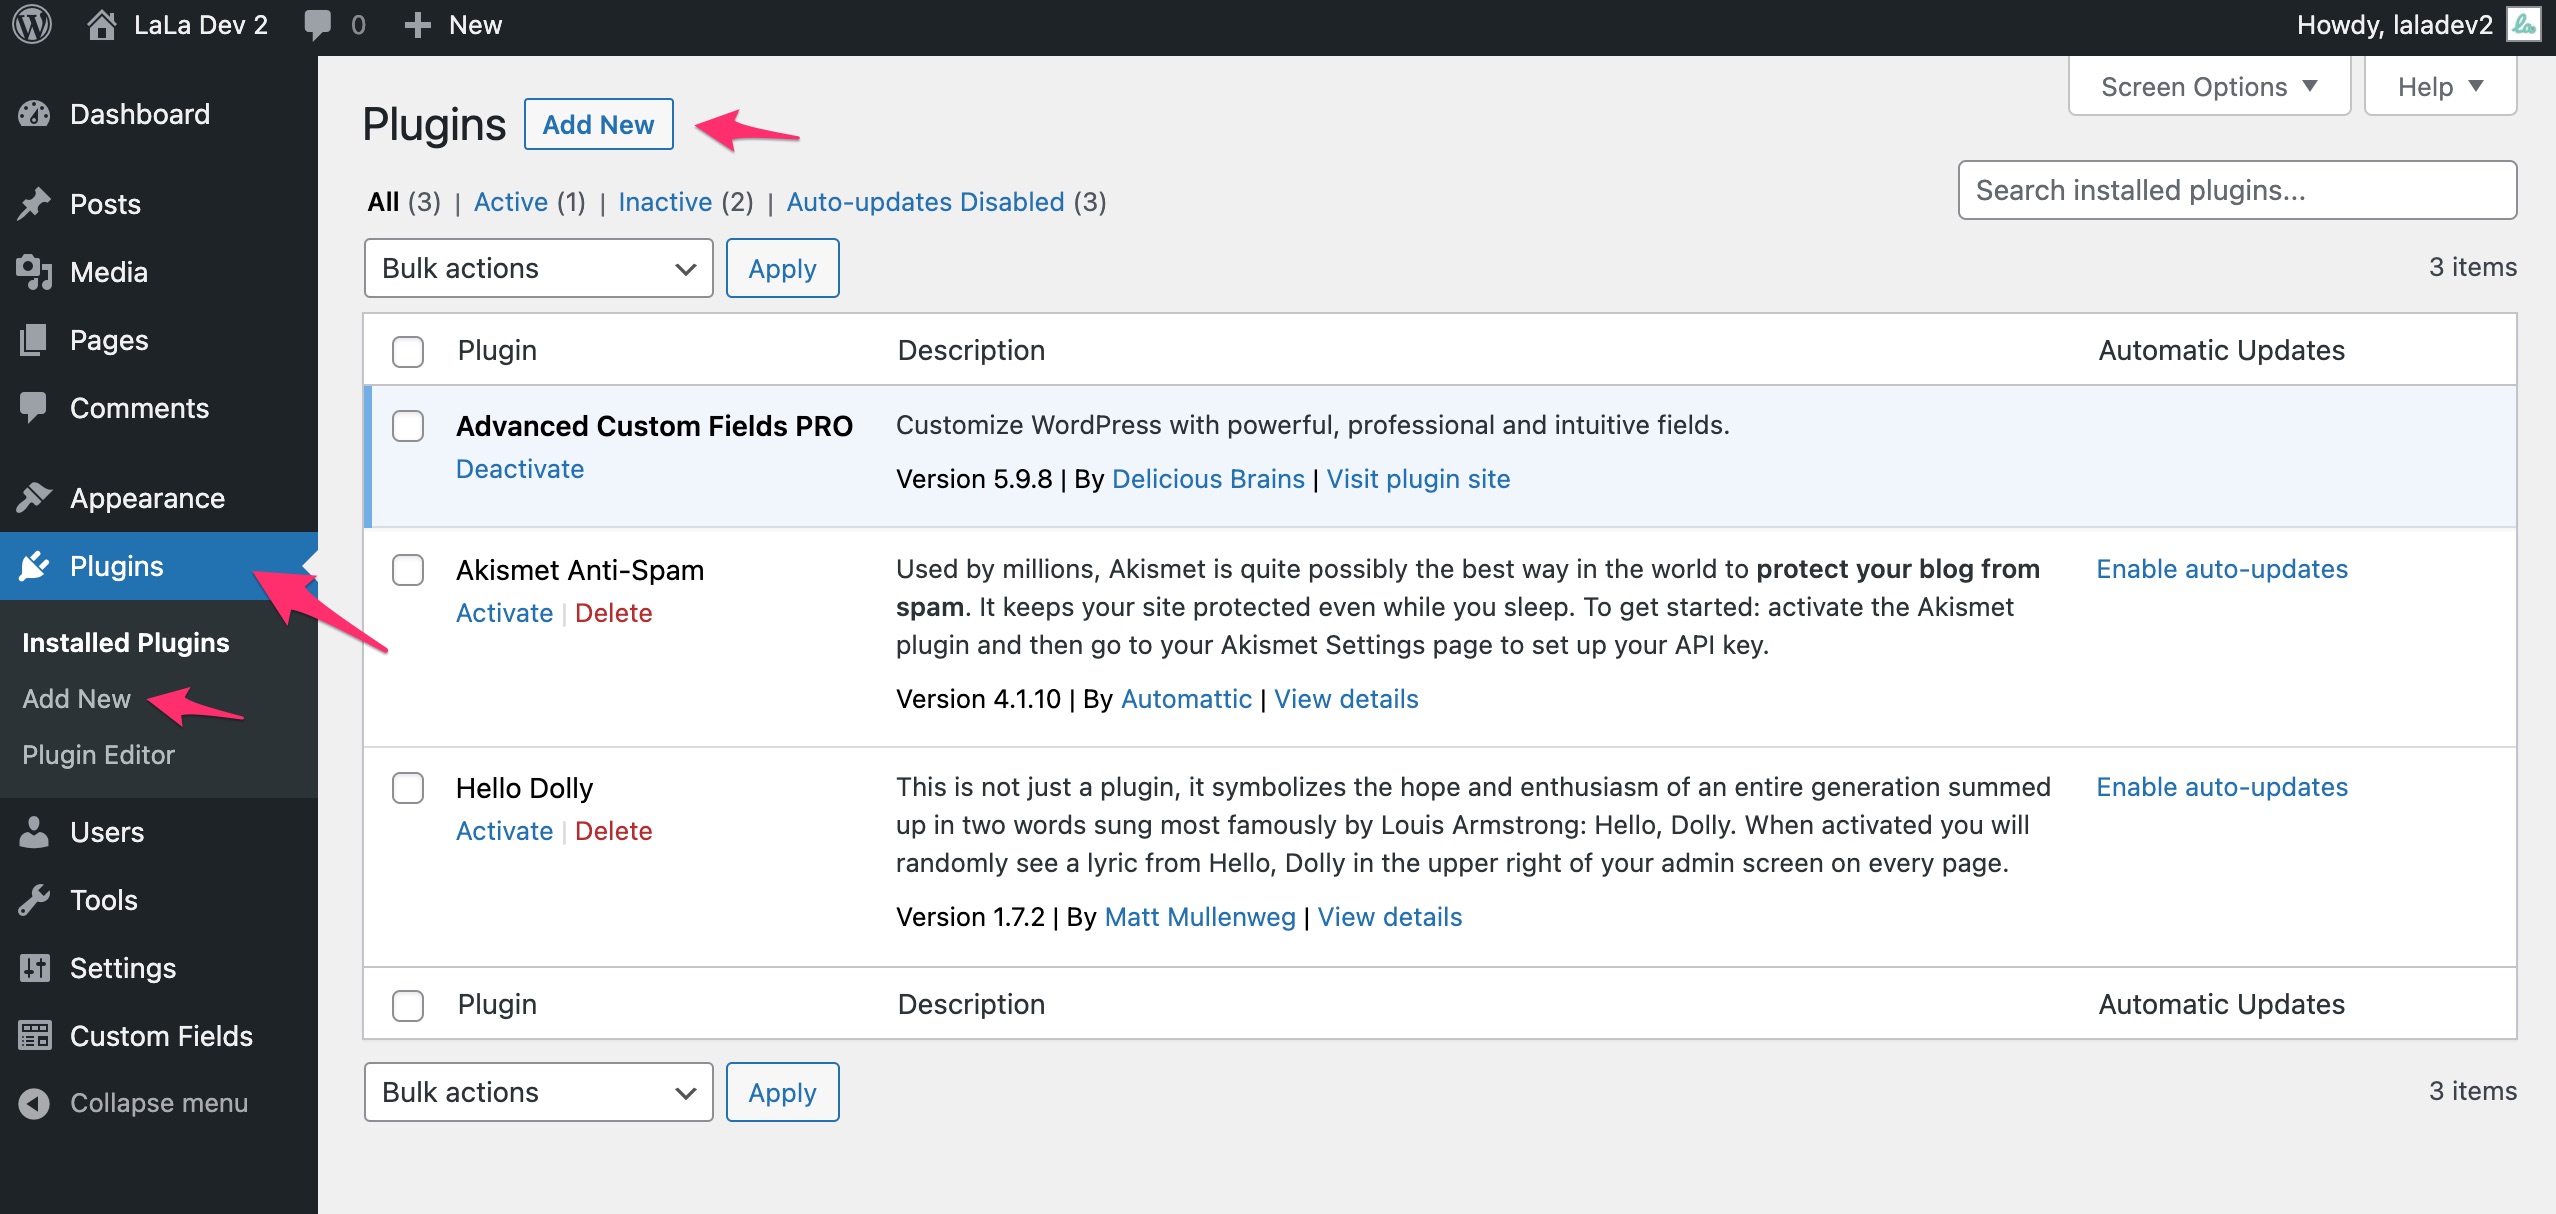
Start by logging into your WP install >> in the WP menu on the left-hand side open the APPEARANCE menu >> then go to PLUGINS. On this page, you will see two buttons that say ADD NEW. Select either one, they both take you to the ADD PLUGINS page.
On the ADD PLUGINS page, you will see a list of free plugins available from the WordPress library. In this case, we don’t want to use a free plugin, we want to upload a premium theme. Click on the button near the top of the page that says UPLOAD PLUGIN.

This will unfurl the UPLOAD PLUGIN area and you will see the option to CHOOSE FILE. Choose the .zip file you purchased and downloaded to your computer earlier >> then click the INSTALL NOW button >> WordPress will do all the heavy lifting >> the last step is to click ACTIVATE.

Additional Setup Required
Even though you have your plugin installed there will typically be additional settings that need to be calibrated. Every WP plugin is structured a little differently, we recommend that you follow the instructions provided by the premium plugin developer.
Good luck with your project!
Head on over to our Contact page if you are interested in working with web pros at LaLa Projects.